
Create EKS Self-managed Node Group
This section will guide you through creating a Self-managed node group.
Fast Forward
If you already have a node group for your cluster, expand this box to fast-forward.
- Proceed to the Verify section.
What You’ll Need
- A configured management environment.
- An existing EKS cluster.
- Access to the AWS console, if you are going to create a self-managed node group.
Procedure
Pick a name for the stack, e.g.,
<EKS_CLUSTER>-workersSpecify the name of the EKS cluster we created previously.
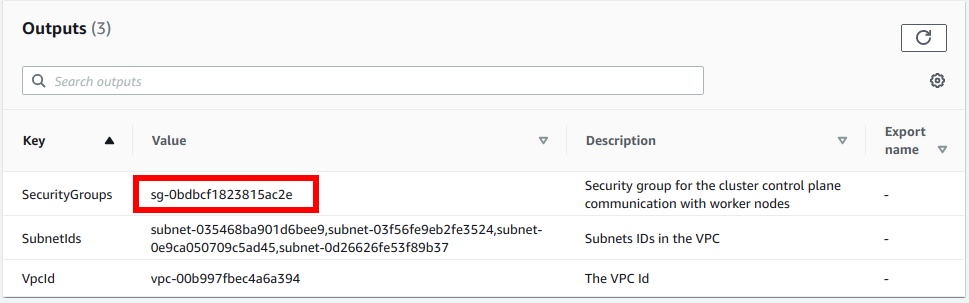
For ClusterControlPlaneSecurityGroup, select the security group you created previously. In case you created a dedicated VPC, choose the SecurityGroups value from the AWS CloudFormation output:
This is the security group to allow communication between your worker nodes and the Kubernetes control plane.
Pick a name for the node group, e.g.,
general-workers. The created instances will be named after<EKS_CLUSTER>-<NODEGROUPNAME>-Node.Set NodeImageIdSSMParam by choosing one of the following options based on the Kubernetes version of your cluster.
/aws/service/eks/optimized-ami/1.21/amazon-linux-2/amazon-eks-node-1.21-v20220429/image_id/aws/service/eks/optimized-ami/1.20/amazon-linux-2/amazon-eks-node-1.20-v20220429/image_id/aws/service/eks/optimized-ami/1.19/amazon-linux-2/amazon-eks-node-1.19-v20220429/image_idSet a large enough NodeVolumeSize, e.g., 200 (GB) since this will hold Docker images and pod’s ephemeral storage.
Select your desired instance type. If it is EBS-only see how to add extra EBS volumes after node group creation.
Specify an EC2 key pair to allow SSH access to the instances. This option is required by the CloudFormation template that we are using.
Ensure that
DisableIMDSv1is set totrueso that worker nodes use IMDSv2 only.Select the VPC, and the subnets to spawn the workers in. Since we will use EBS volumes, we highly recommend that the ASG spans a single Availability zone. Make sure you choose them from the given drop down list.
In Configure stack options, specify the Tags that Cluster Autoscaler requires so that it can discover the instances of the ASG automatically:
Key Value k8s.io/cluster-autoscaler/enabled true k8s.io/cluster-autoscaler/<EKS_CLUSTER> owned
Create the stack and wait for CloudFormation to
- Create an IAM role that worker nodes will consume.
- Create an AutoScalingGroup with a new Launch Template.
- Create a security group that the worker nodes will use.
- Modify given cluster security group to allow communication between control plane and worker nodes.
After the stack has finished creating, continue with the enable nodes to join your cluster section to complete the setup of the node group.
Verify
Go to your GitOps repository, inside your
rok-toolsmanagement environment:root@rok-tools:~# cd ~/ops/deploymentsRestore the required context from previous sections:
root@rok-tools:~/ops/deployments# source <(cat deploy/env.eks-cluster)root@rok-tools:~/ops/deployments# export EKS_CLUSTERVerify that EC2 instances have been created:
root@rok-tools:~/ops/deployments# aws ec2 describe-instances \ > --filters Name=tag-key,Values=kubernetes.io/cluster/${EKS_CLUSTER?} { "Reservations": [ { "Groups": [], "Instances": [ { "AmiLaunchIndex": 0, "ImageId": "ami-012b81faa674369fc", "InstanceId": "i-0a1795ed2c92c16d5", "InstanceType": "m5.large", "LaunchTime": "2021-07-27T08:39:41+00:00", "Monitoring": { "State": "disabled" }, "Placement": { "AvailabilityZone": "eu-central-1b", "GroupName": "", "Tenancy": "default" }, ...Verify that all EC2 instances use IMDSv2 only:
Retrieve the EC2 instance IDs of your cluster:
root@rok-tools:~/ops/deployments# aws ec2 describe-instances \ > --filters Name=tag:kubernetes.io/cluster/${EKS_CLUSTER?},Values=owned \ > --query "Reservations[*].Instances[*].InstanceId" --output text) i-075363bbf64a60e04 i-06a5ee72c6eed1badRepeat the steps below for each one of the EC2 instance IDs in the list of the previous step.
Specify the ID of the EC2 instance to operate on:
root@rok-tools:~/ops/deployments# export INSTANCE_ID=<INSTANCE_ID>Replace
<INSTANCE_ID>with one of the IDs you found in the previous step, for example:root@rok-tools:~/ops/deployments# export INSTANCE_ID=i-075363bbf64a60e04Verify that the
HttpTokensmetadata option is set torequired:root@rok-tools:~/ops/deployments# aws ec2 get-launch-template-data \ > --instance-id ${INSTANCE_ID?} \ > --query 'LaunchTemplateData.MetadataOptions.HttpTokens == `required`' trueVerify that the
HttpPutResponseHopLimitmetadata option is set to1:root@rok-tools:~/ops/deployments# aws ec2 get-launch-template-data \ > --instance-id ${INSTANCE_ID?} \ > --query 'LaunchTemplateData.MetadataOptions.HttpPutResponseHopLimit == `1`' trueGo back to step i and repeat steps i-iv for the remaining instance IDs.
Verify that Kubernetes nodes have appeared:
root@rok-tools:~/ops/deployments# kubectl get nodes NAME STATUS ROLES AGE VERSION ip-172-31-0-86.us-west-2.compute.internal Ready <none> 8m2s v1.21.5-eks-bc4871b ip-172-31-24-96.us-west-2.compute.internal Ready <none> 8m4s v1.21.5-eks-bc4871b
Summary
You have successfully created a self-managed node group.